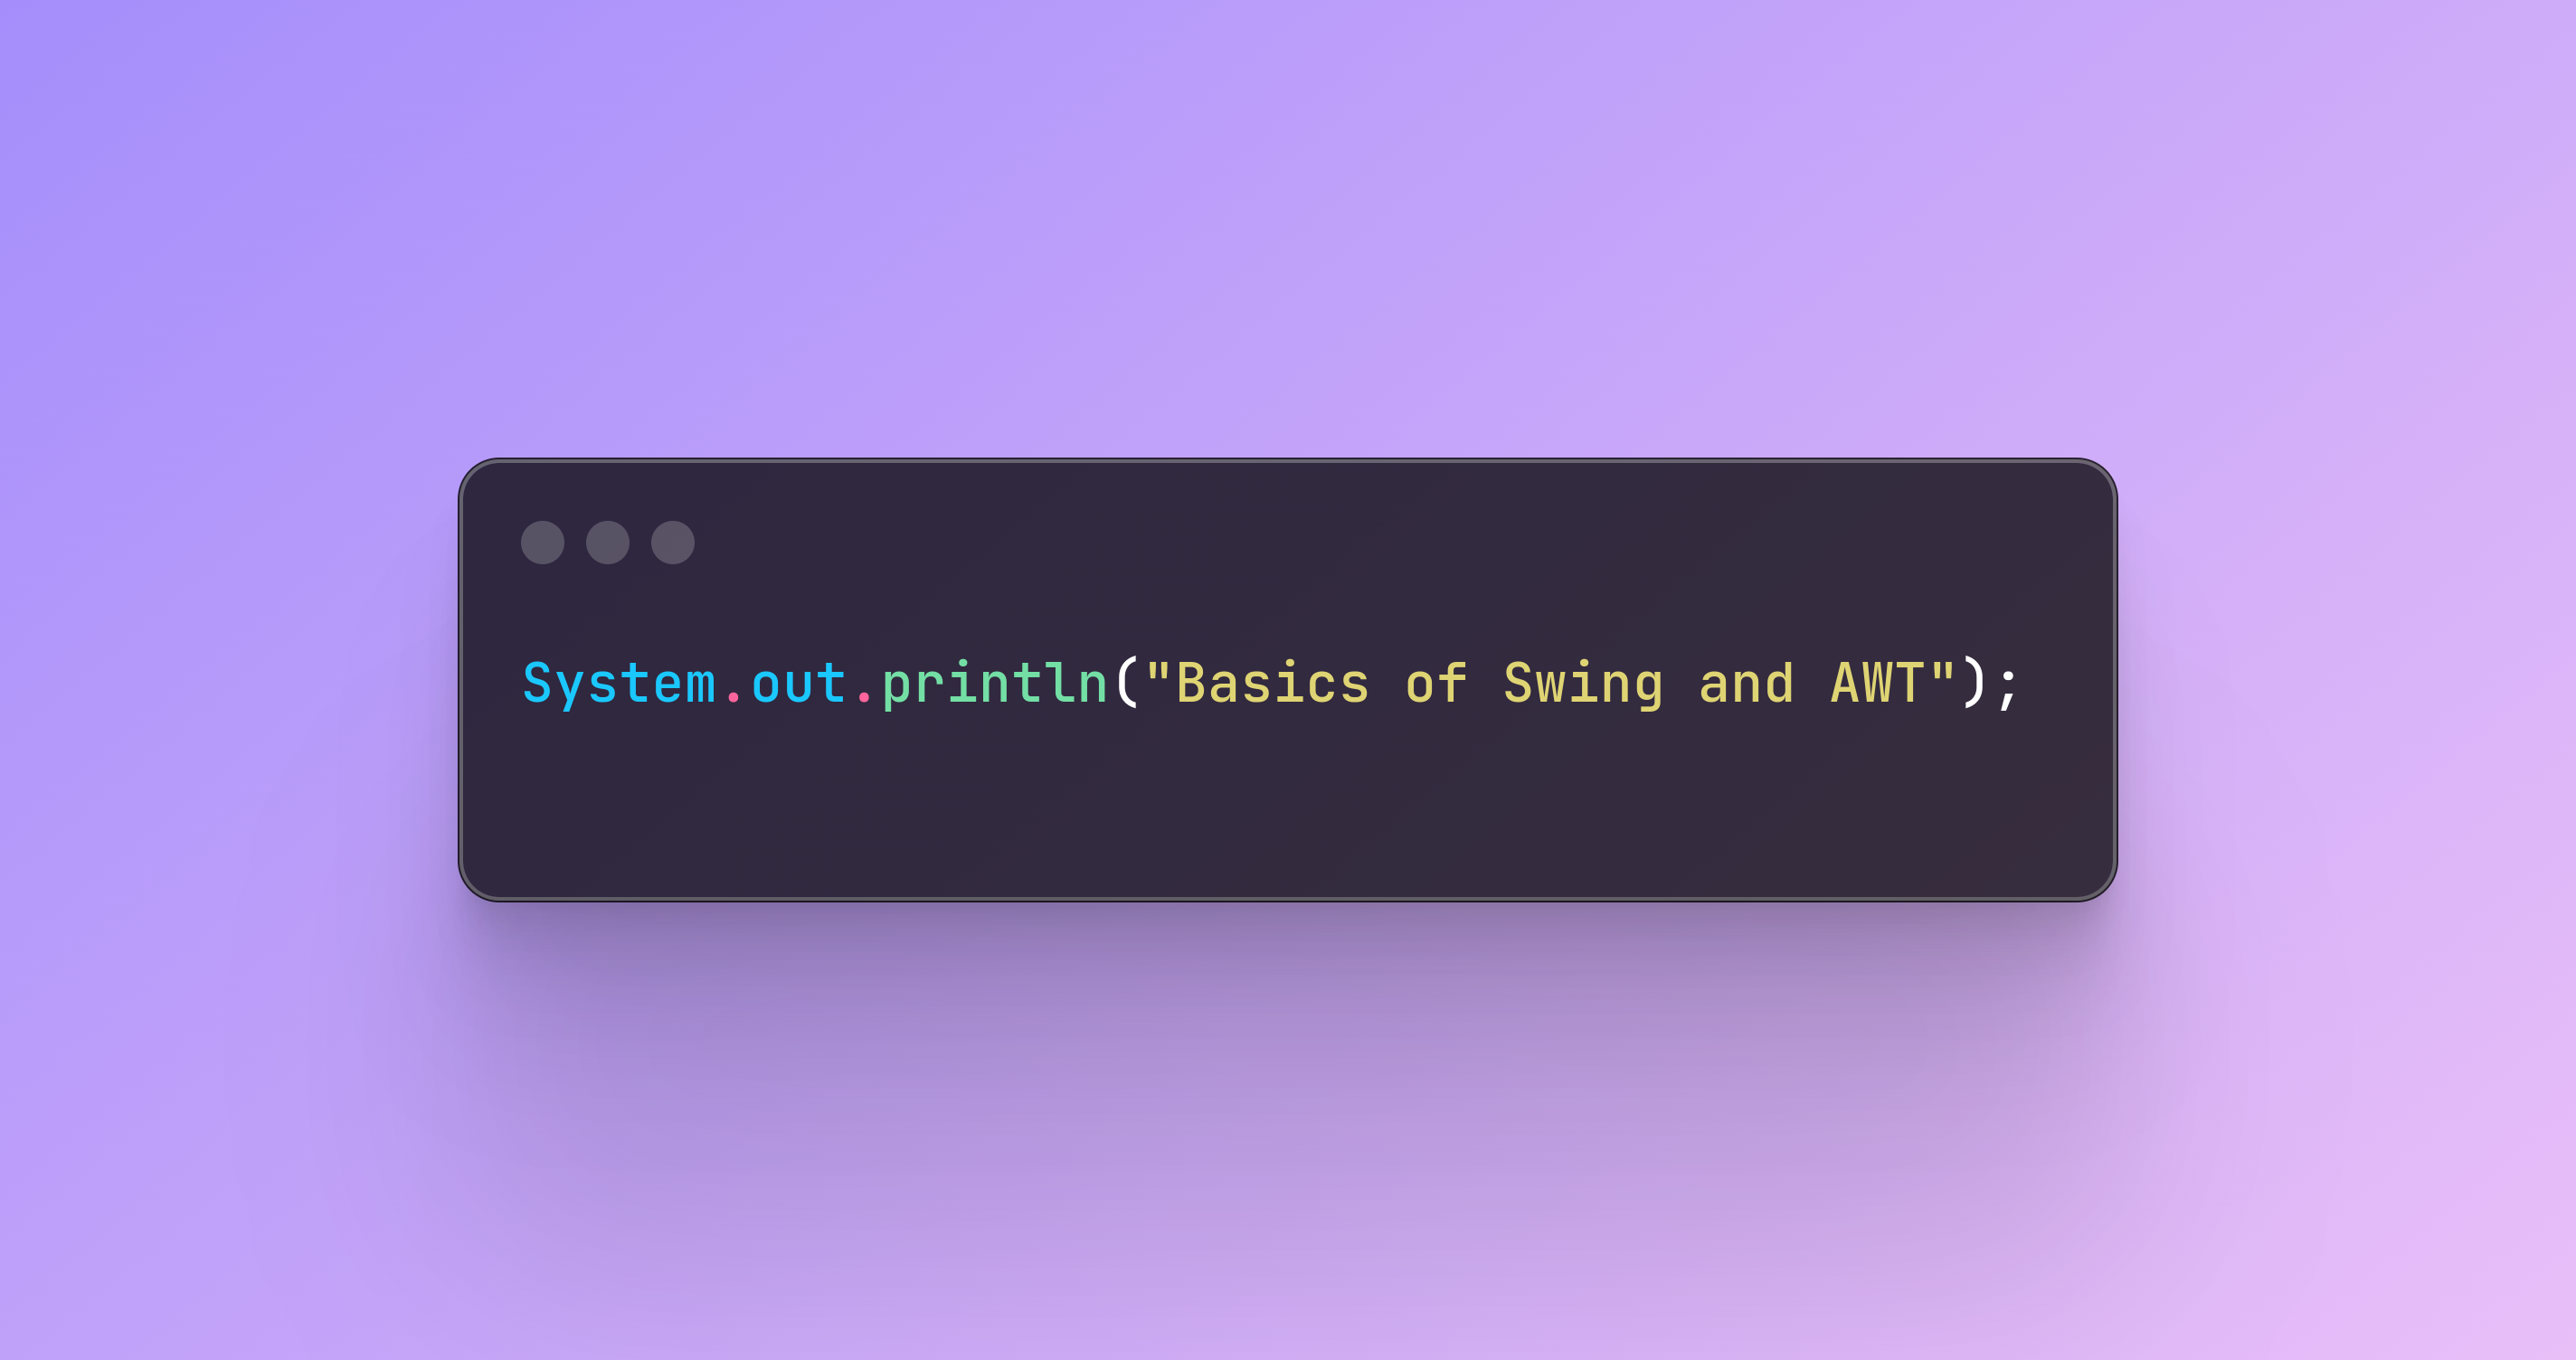
Basics of Swing and AWT
Did you ever thought about how to start write Java programs, which already are not console programs? Or have you ever wondered how can you start write more user-friendly programs? If you answered yes to any of those questions, you have come to the right place. In this article I would like to present you basics of Swing and AWT - toolkits, which are used to create graphical user interface for Java applications. I will create clock app step by step with option to change format from 12 hours to 24 hours and and vice versa.
What's the difference?
Swing
- Swing is newer and more advanced library than AWT.
- Swing is based on AWT and offers more advanced components (lightweight components). Components are platform independent. Sample components: JButton, JLabel, JTextField, JFrame.
- Swing ensure uniform appearance and behavior on various operating systems.
- Swing provide more configurable and interactive components.
- Swing is more efficient and flexible.
AWT
- AWT is older and simpler library.
- AWT components are native OS components (heavyweight components). It means, that AWT uses native OS resources to render its components. Sample components: Button, Label, TextField, Frame.
- AWT components may appear and behave different on various operating systems.
- AWT components are not very flexible.
- AWT is slower and less efficient.
In practice we can mix Swing components with AWT components in our apps, but it often leads our UI to mixed look & feel or more critical errors and bugs like not working rendering or interactions.
Basic components to start build GUI
JFrame
It is most basic class in Swing library, which you must know. It simply represents window, in which our application will run. This class offers a lot of configuration possibilities. You can for example determine:
- Title of window,
- Size of window,
- Default close operation,
- Default window position on the screen,
- Visibility,
- And much more...
Now I will present you how to create such window by JFrame. Look at code below:
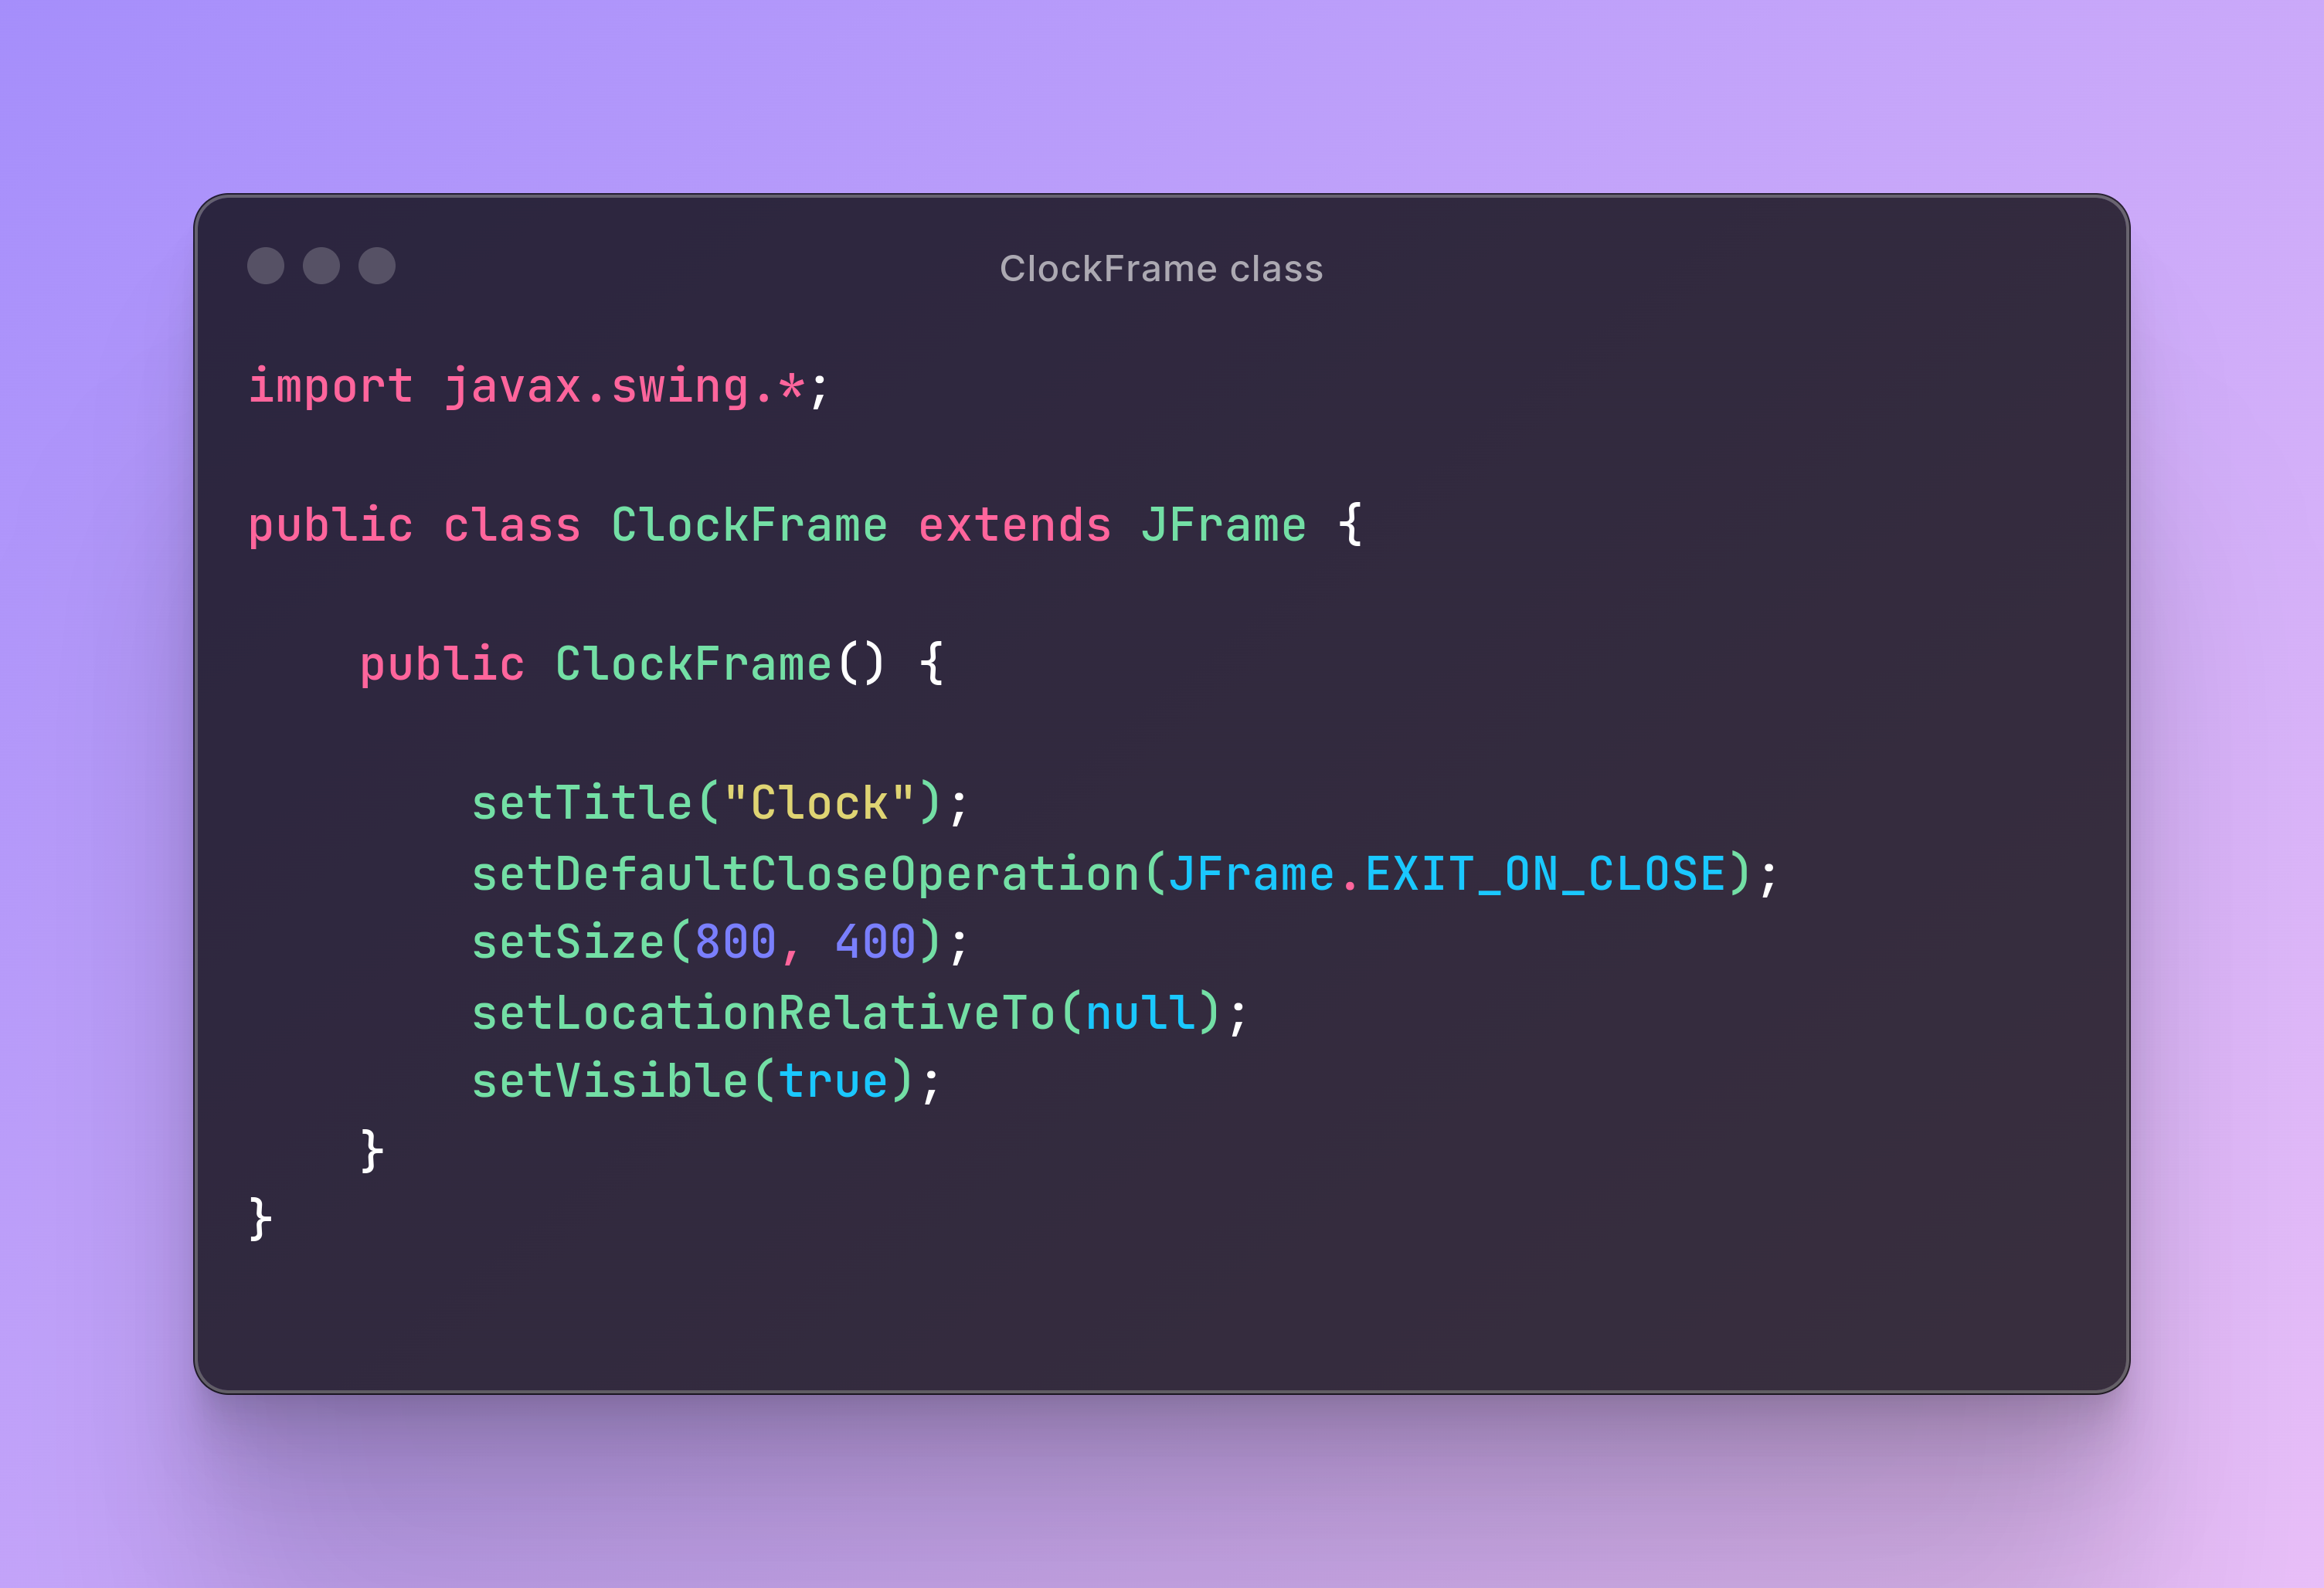
ClockFrame class
I created ClockFrame class, which extends JFrame class. It means, that in my class I have all properties from JFrame class. You can also create object of JFrame class in main method for example and give this object the same properties as on screen above, but to keep clean architecture I prefer creating custom frame classes. In class constructor I specified some properties:
- setTitle("Clock") - Title of window will be "Clock".
- setDefaultCloseOperation(JFrame.EXIT_ON_CLOSE) - App will stop when you close window.
- setSize(800, 400) - Size of window will be 800x400 (WIDTH x HEIGHT).
- setLocationRelativeTo(null) - Window will appear in the middle of screen by default.
- setVisible(true) - Window will be visible.
And of course, there are many more possibilities to customize windows but... there are so many of them, so I won't be able to sh
Main class
In main class I called method invokeLater() on SwingUtilities class, but why? This method is very important and used to execute a given block of code in a Swing event dispatch thread, which is responsible for handling user UI events.
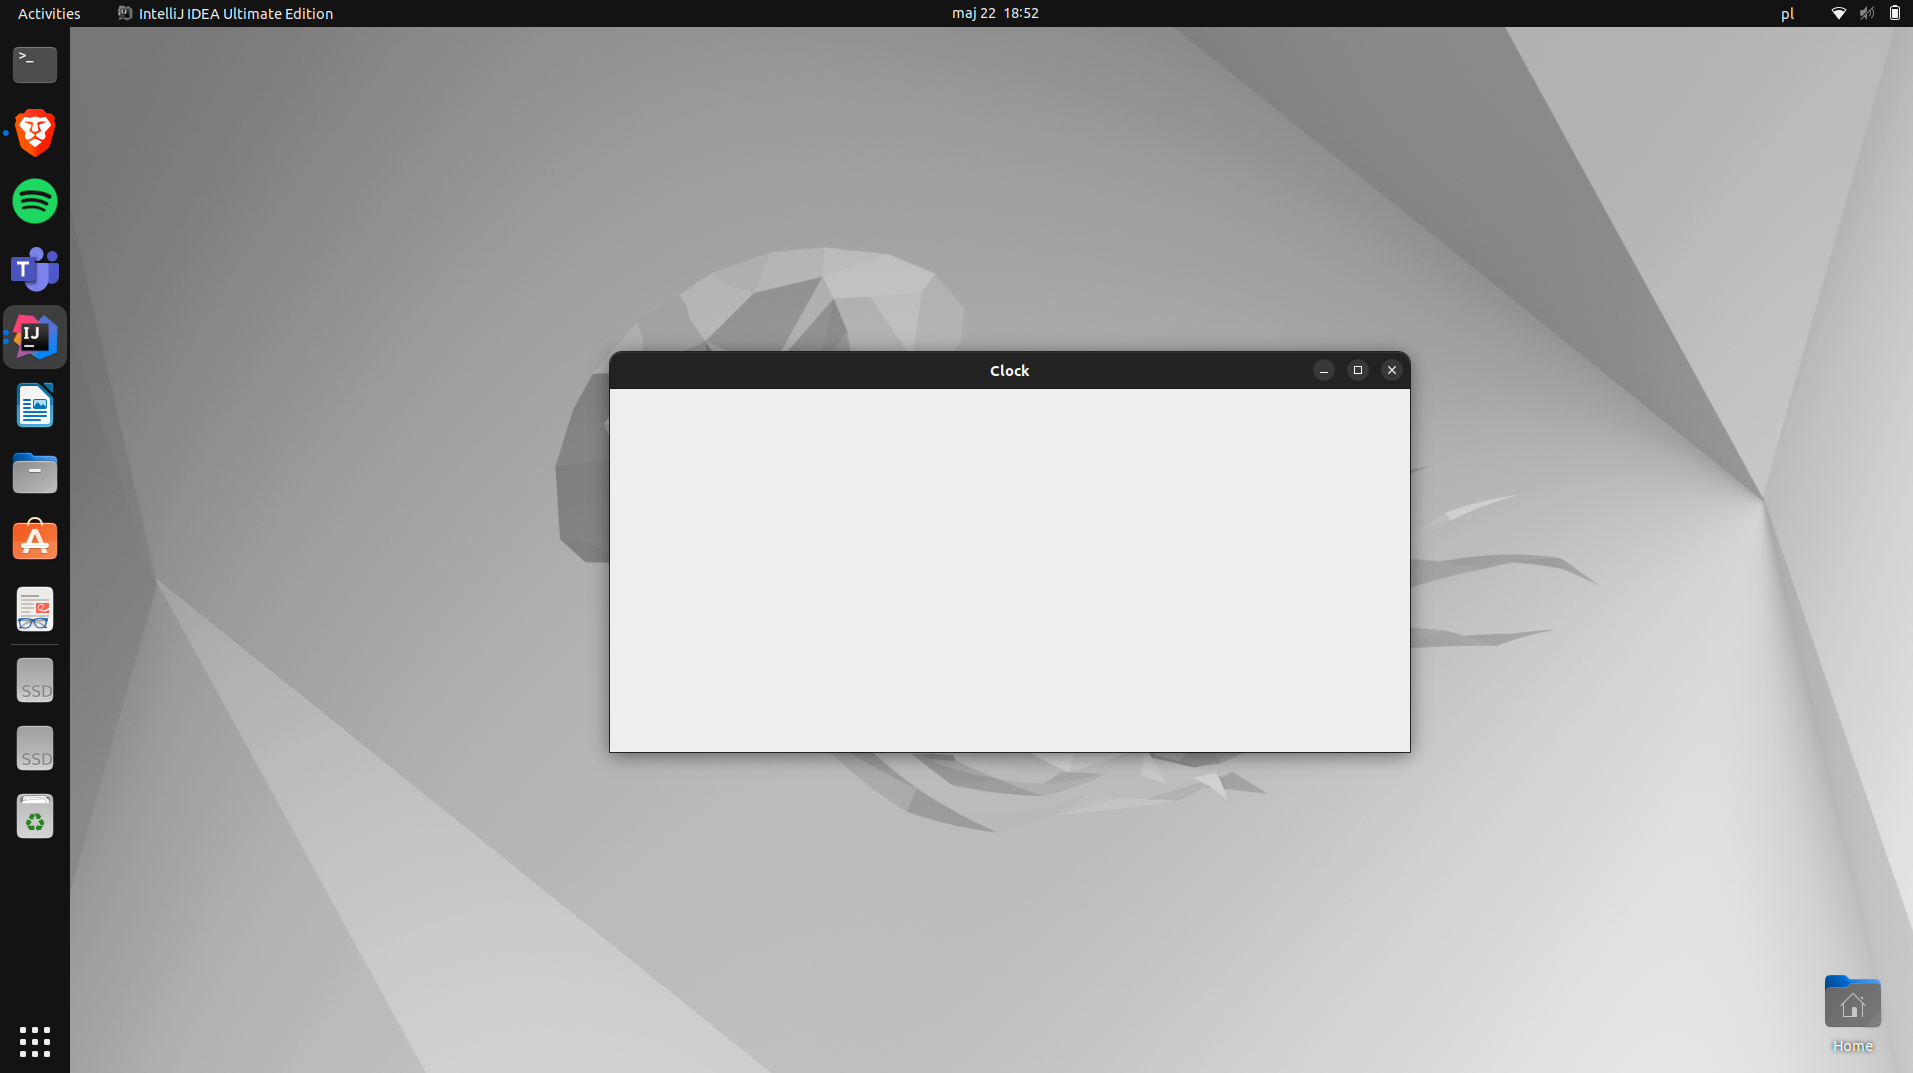
In this case ClockFrame::new invokes constructor of ClockFrame class in the Swing dispatch thread. This means that creating a new instance of the ClockFrame class and any GUI-related operations will be performed in the appropriate thread, which is crucial for ensuring the correctness of Swing applications. Note, that to the end of this article I won't change Main class. When you run the application you will see this:
Layouts
Layouts are very important thing. We use them to control arrangement of components in containers like JPanel or JFrame. There are a couple of layout managers, which enables to create various UI structures. I would like to present you the most important and the most used.
BorderLayout
This layout divide container to five areas: north, south, east, west and center. Each area can contain only one component (also next container). Components are stretched to fill areas assigned to them.
FlowLayout
FlowLayout set components in one row, left to right, and then moves to the next row when current row is full. It is default layout for JPanel.
BoxLayout
It allows you to arrange components in one row (horizontally) or in one column (vertically). It enables to precisely control arrangement of components.
GridLayout
This layout organises components into a grid with rows and columns. Each cell in the grid have the same size.
JPanel
Next very important class. It represents panel, in which we put all other components (other panels, buttons, text fields, tables, labels...). Let's create main panel for our clock! Consider code below:
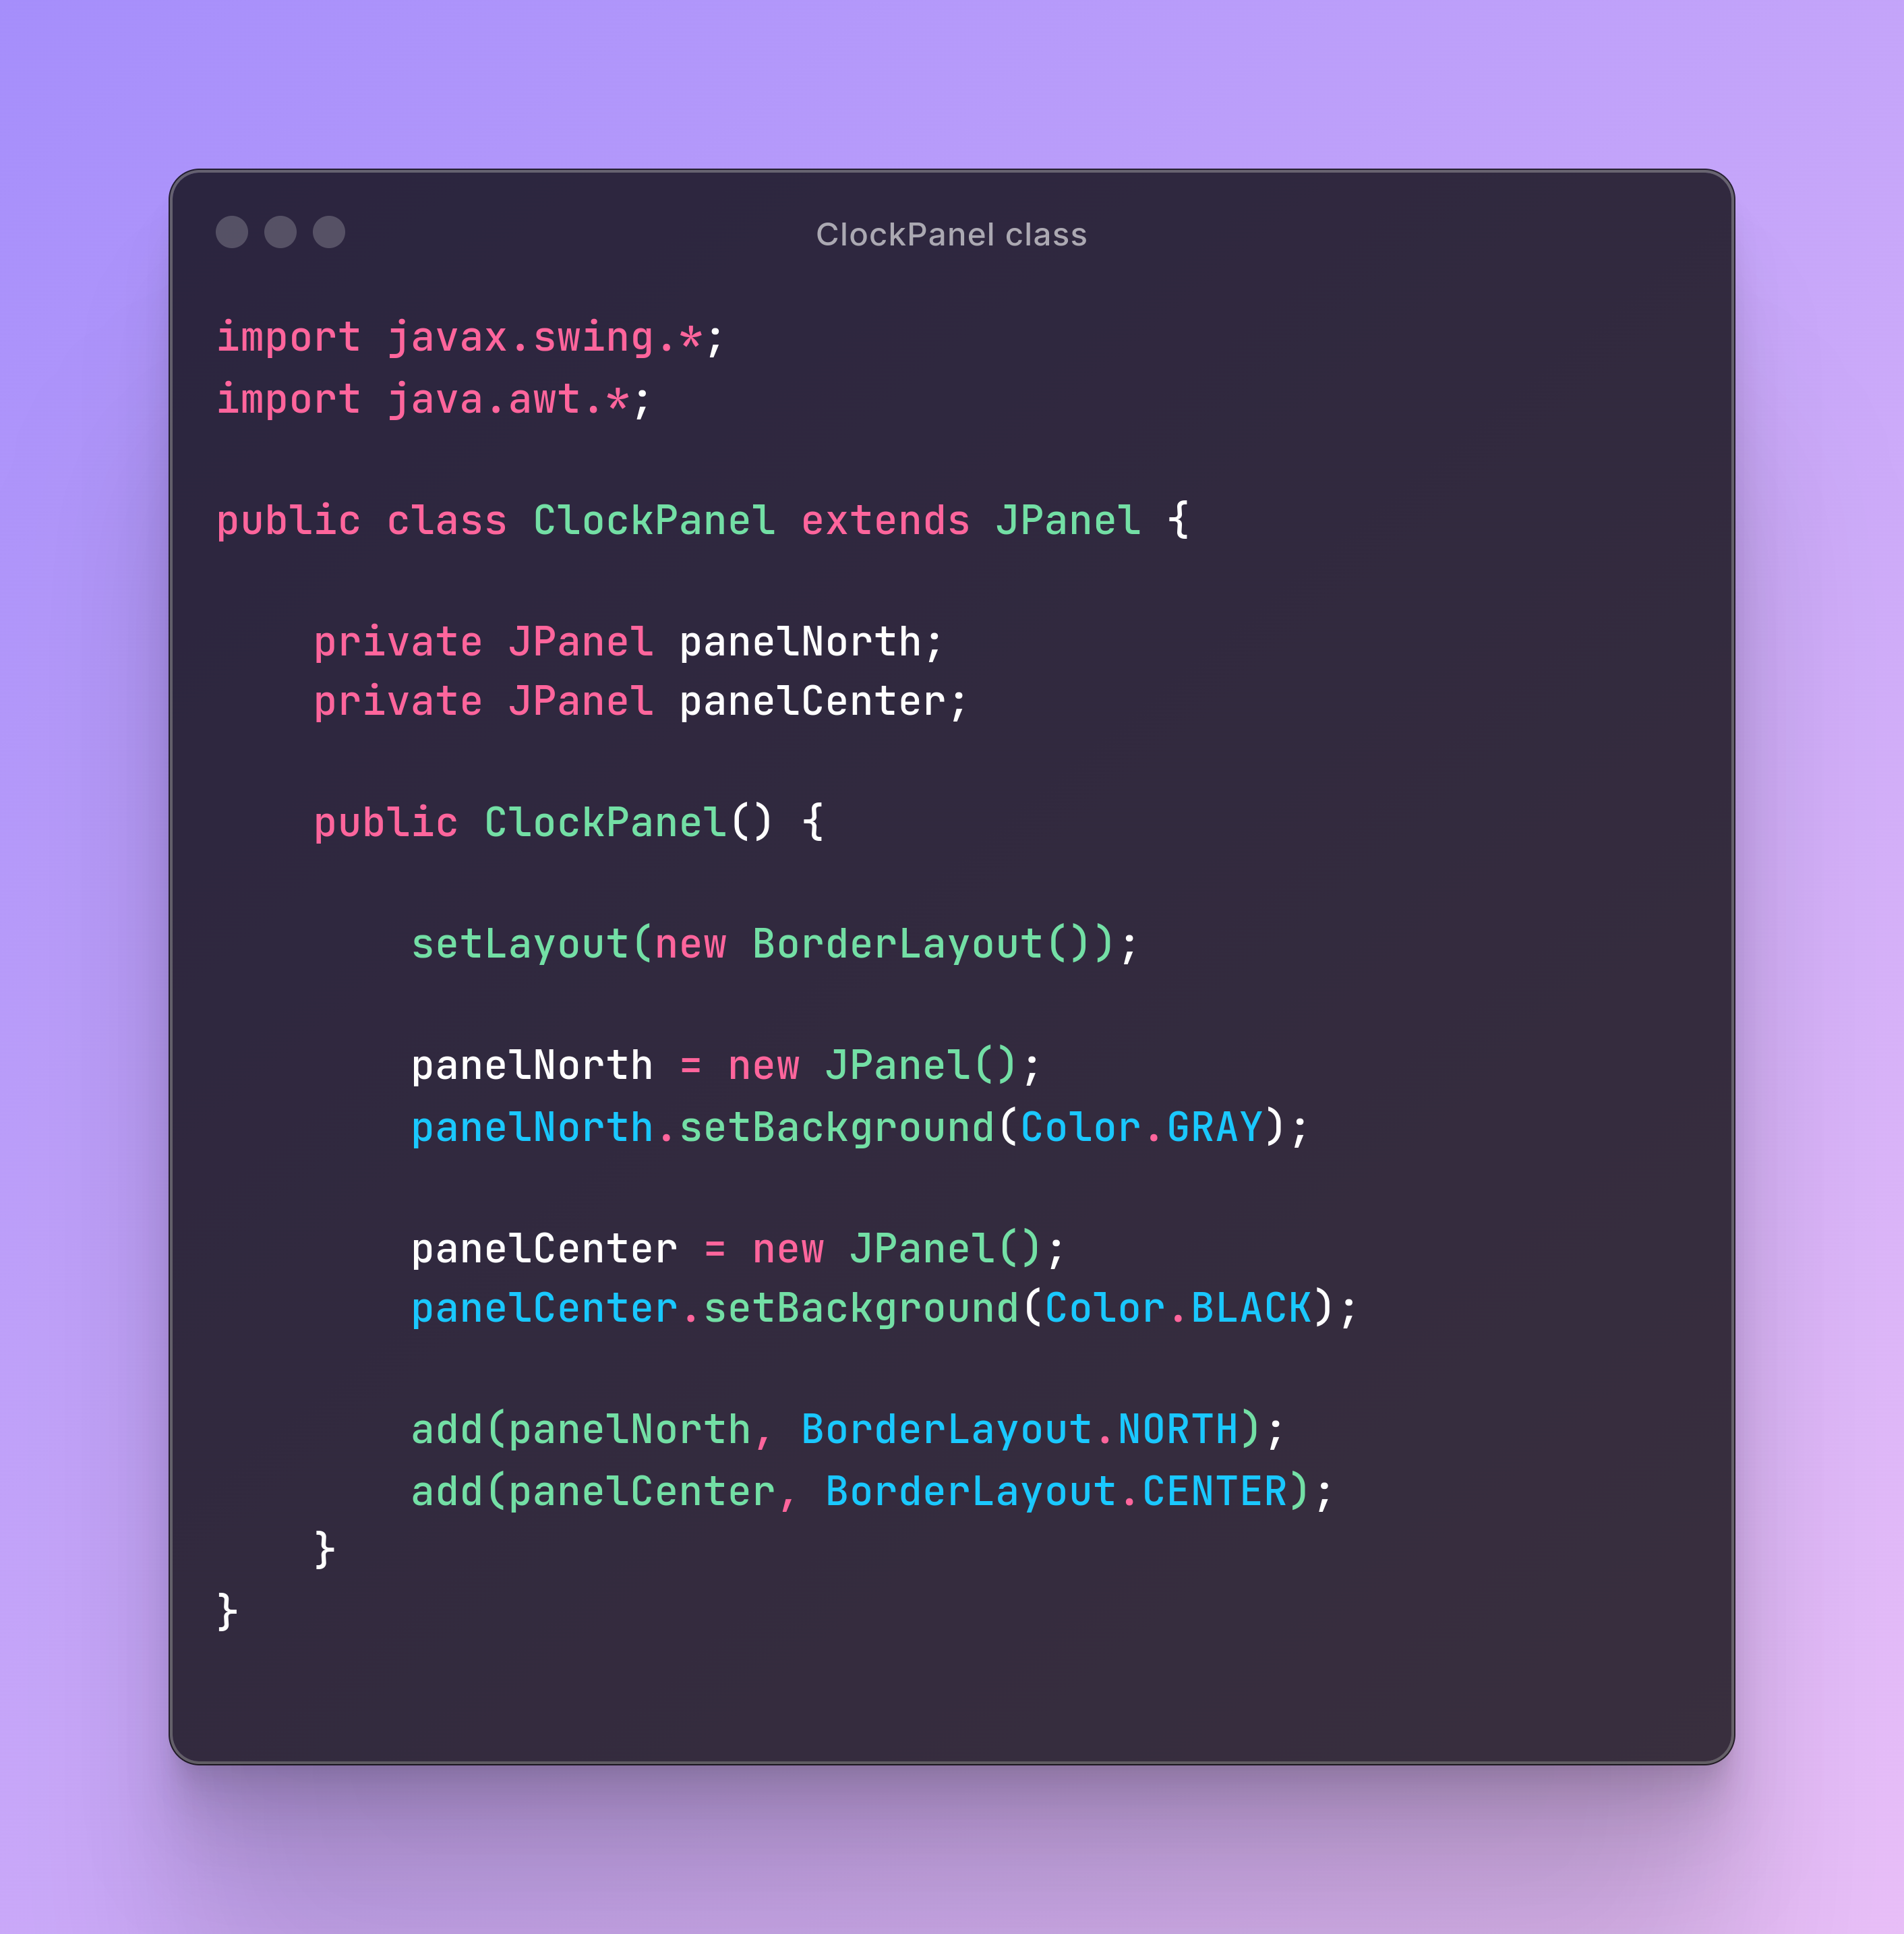
ClockPanel class
I created ClockPanel class, which extends JPanel class. Class has two private fields, which also contains objects of JPanel class: panelNorth and panelCenter. In constructor of class, firstly with setLayout() method I determined default layout of panel and I chose BorderLayout.
Then I assigned panelNorth and panelCenter fields with JPanel objects. For panelNorth, with setBackground() method I set background color to GRAY and for panelCenter to BLACK.
On the end I added panelNorth at the top of ClockPanel and panelCenter in the middle of ClockPanel.
ClockFrame class
As you can see on second screen, with add() method I added new instance of ClockPanel class to the ClockFrame and that's the effect after running program:

JLabel
JLabel, as you can guess, is class which represents labels. With JLabel we can display text, images or both in the same time. In our app I will use JLabel to display clock on screen. Let's create clock label in our code:
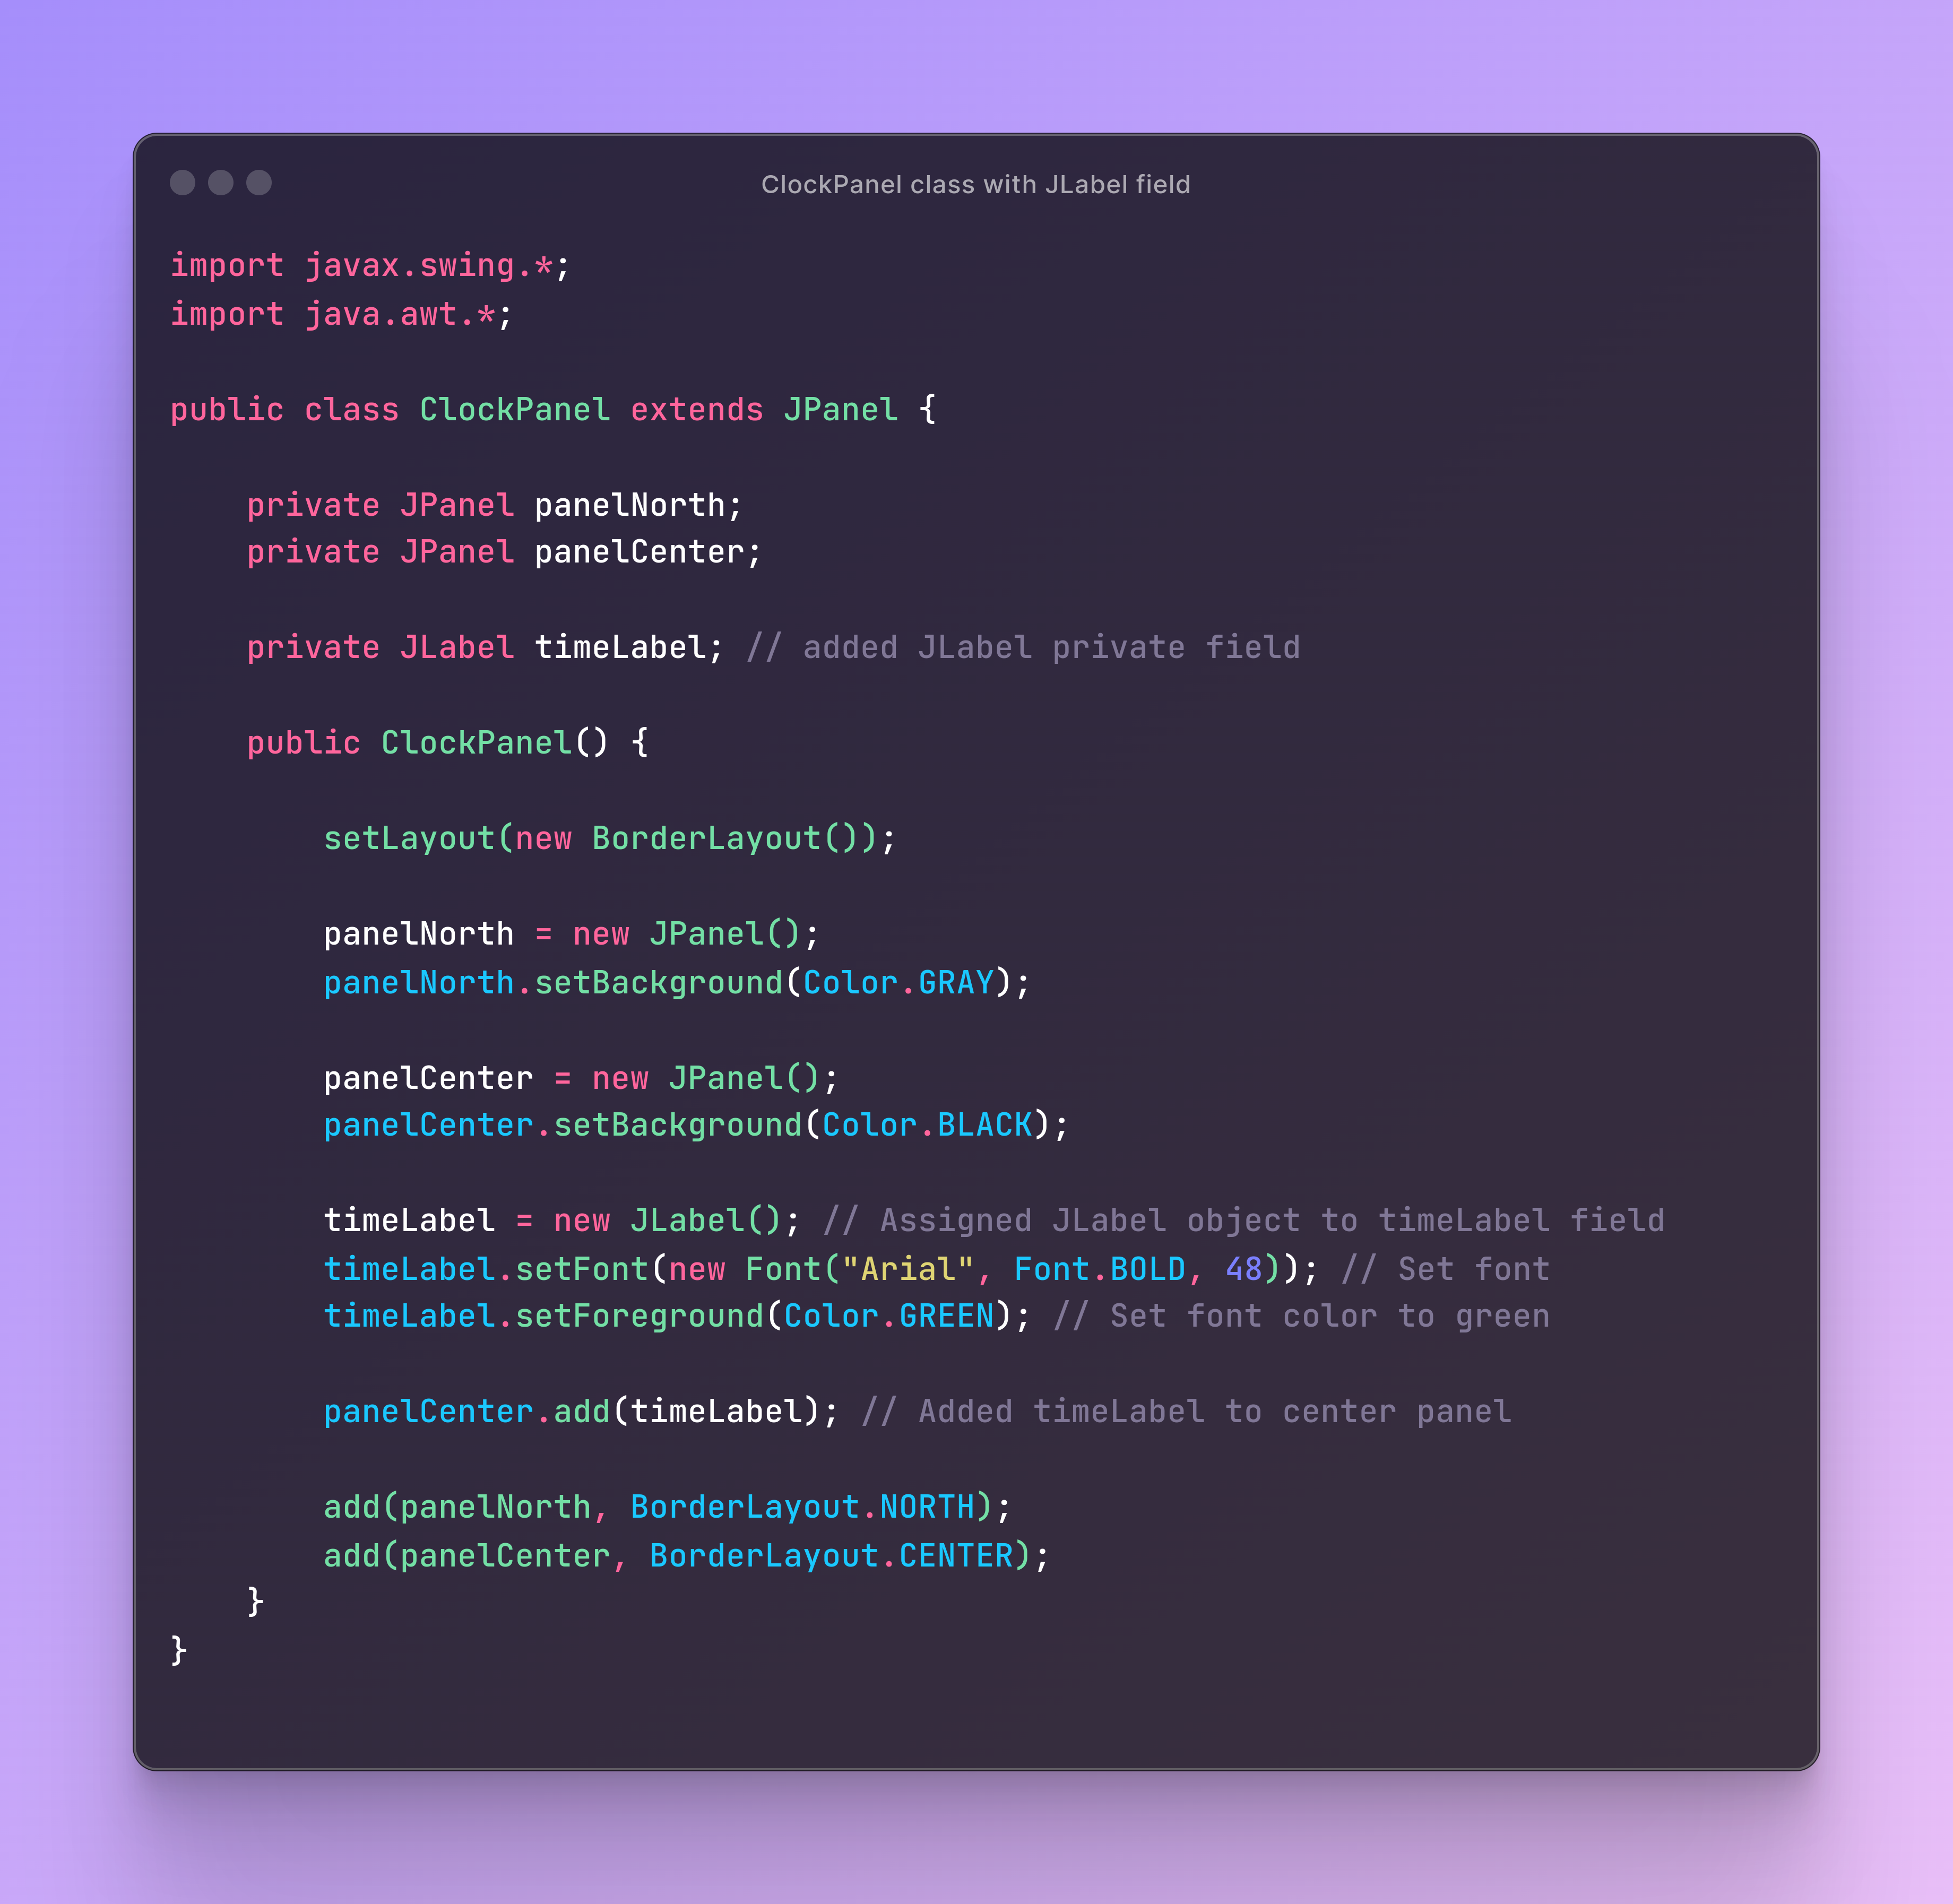
- I created timeLabel private field, whose type is JLabel.
- In constructor I assigned new JLabel object to this field and changed some properties.
- With setFont() method I changed font of our clock (font name, font type and font size).
- With setForeground() I set font color to green. On the end I added this new field to center panel with add() method.
Timer
To update our clock every second, we can use Timer class. This class simply executes certain operations in specified time intervals, so It is perfect solution for us.
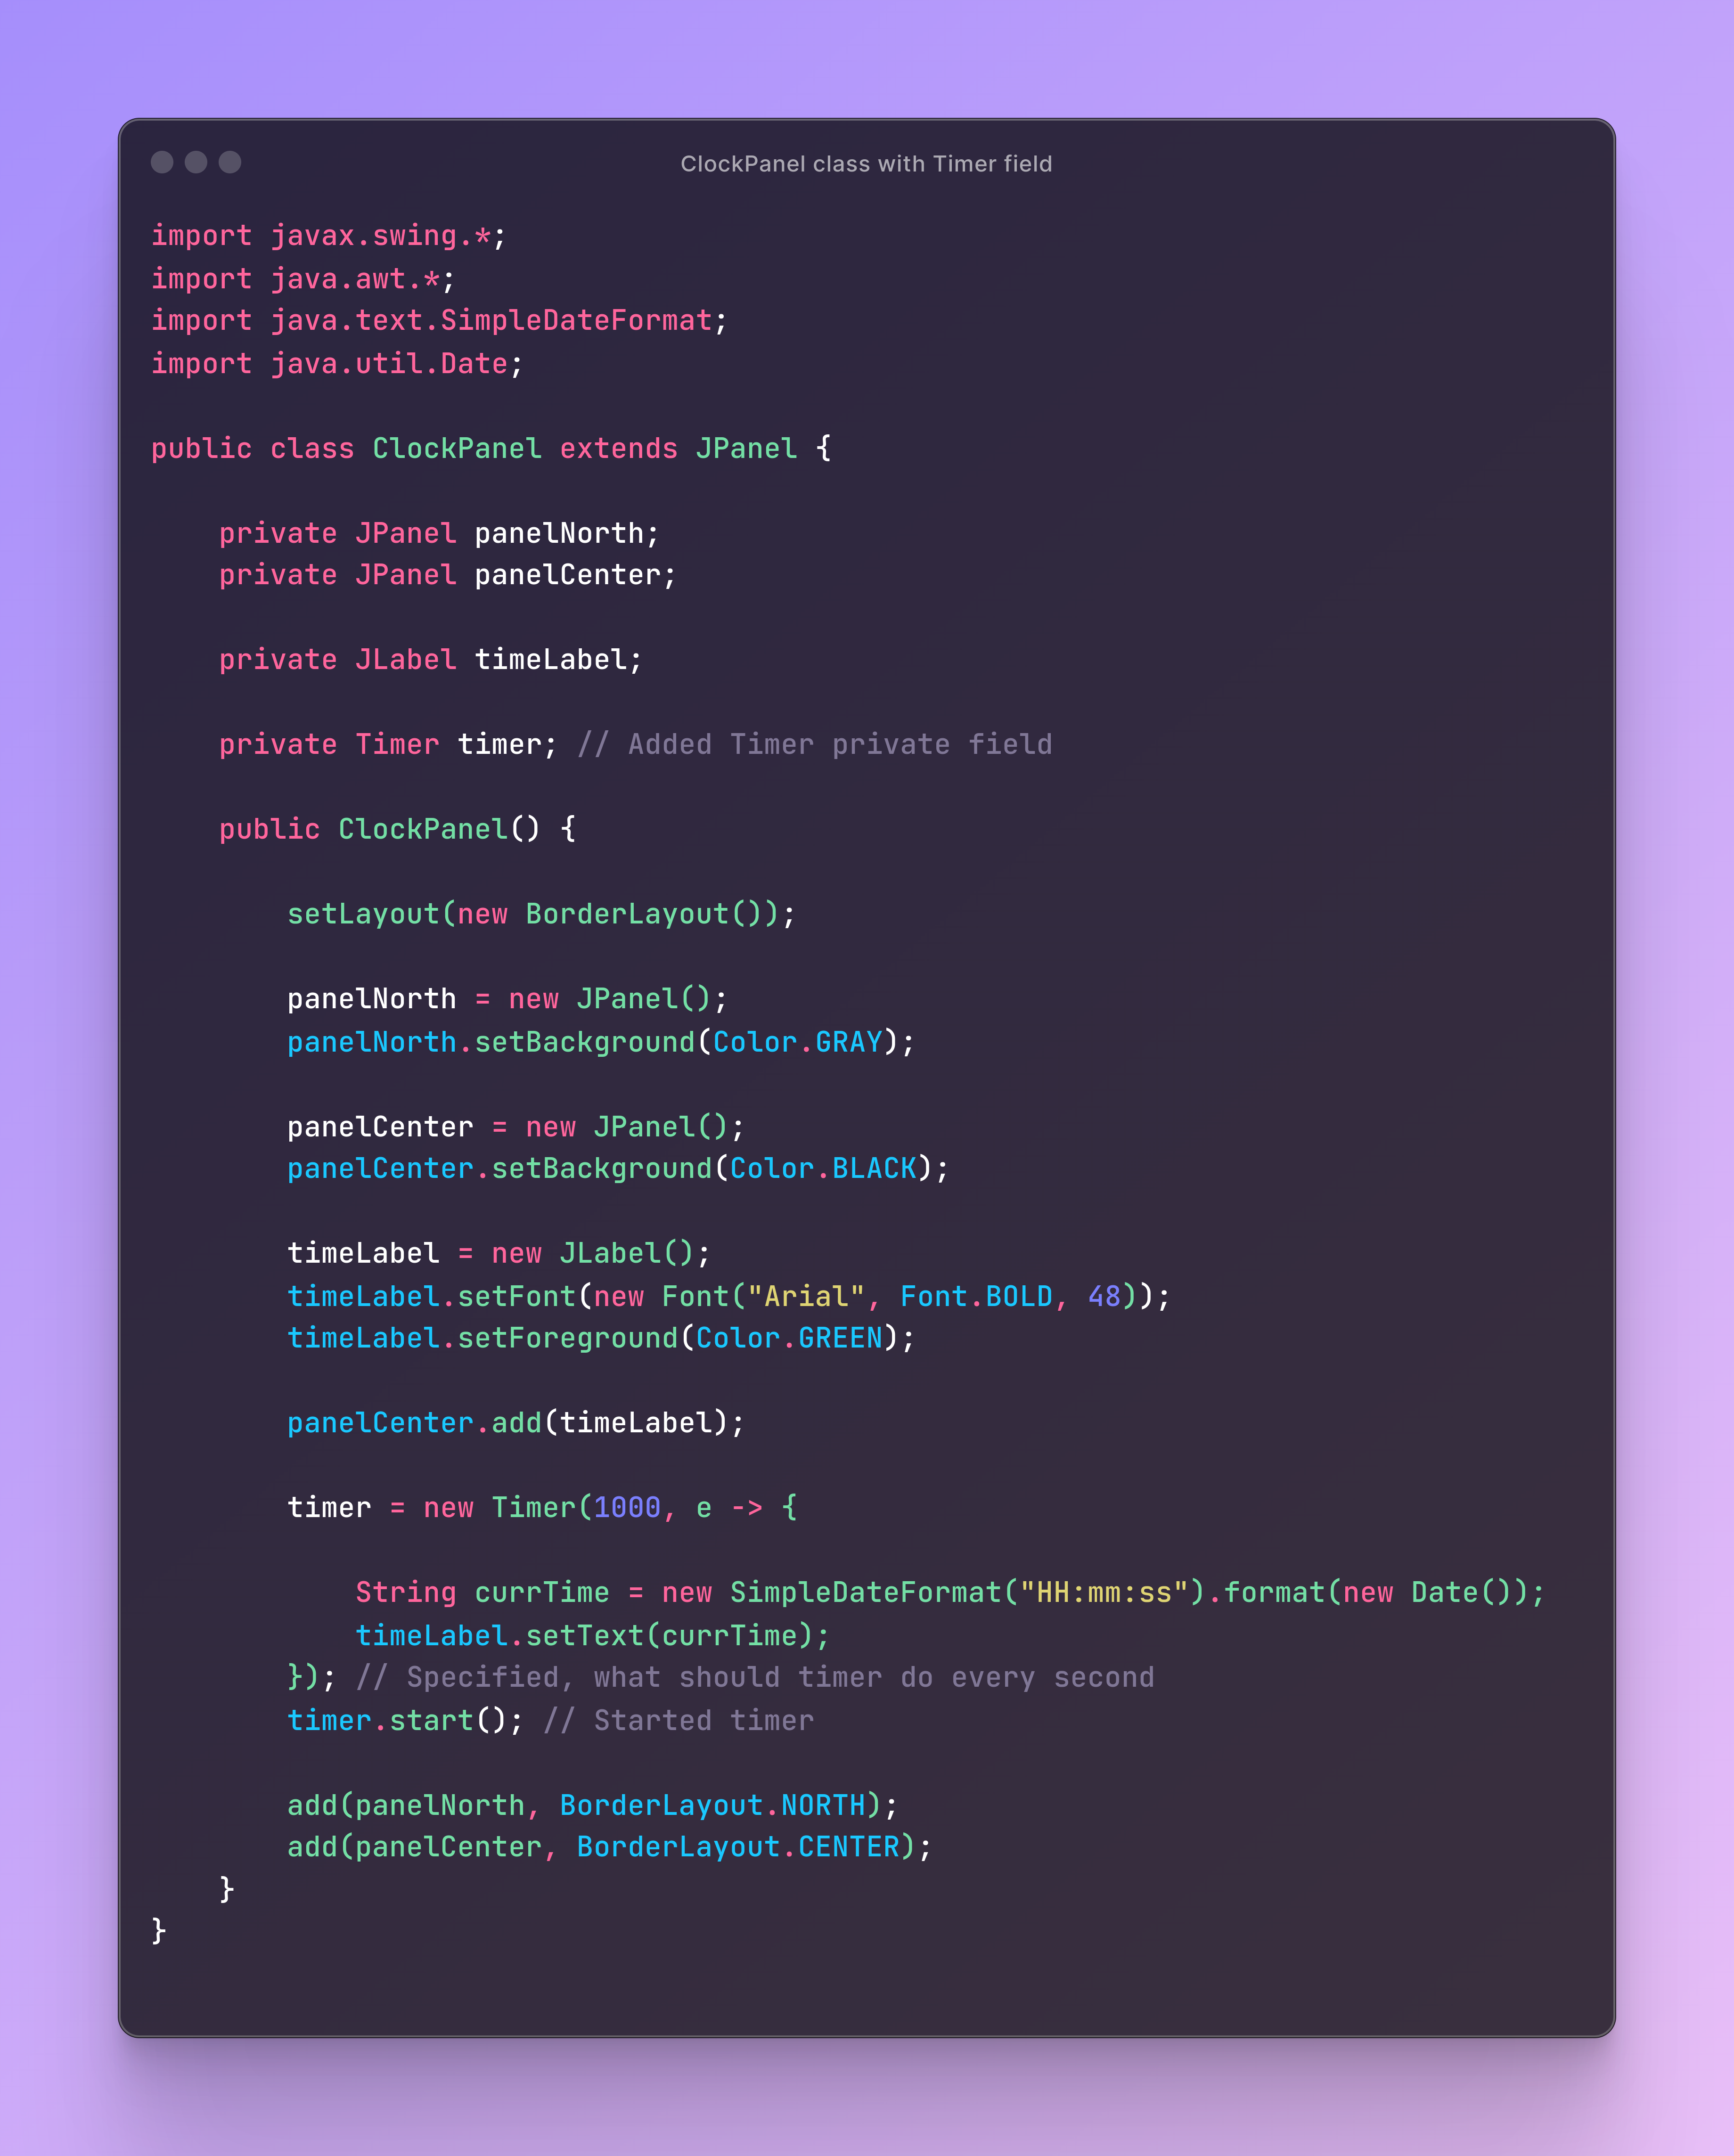
- I created timer private field, whose type is Timer.
- I created SimpleDateFormat to spicify time format.
- In constructor I assigned new Timer object to this field.
- As an arguments of new Timer object I entered 1000 what specifies that the timer will perform operations inside it every second. For example, when you enter 5000, timer will perform operations in every 5 seconds. e -> { ... } is lambda expression, shorter form of actionPerformed method from ActionListener interface. In this lambda we determine what Timer should do in specified earlier intervals. In this case I datermined, that every second timer updates our timeLabel to display current time.
- I started timer with start() method.
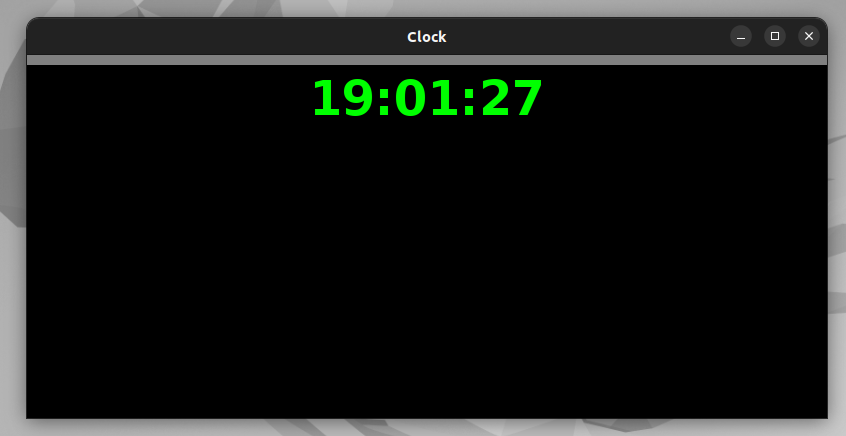
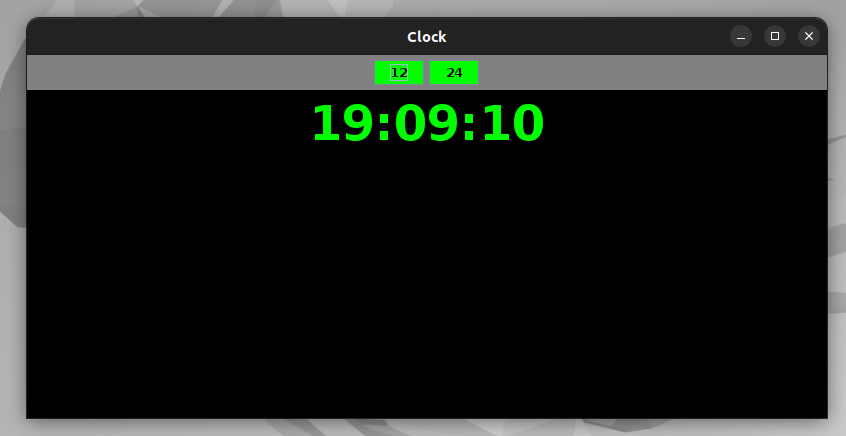
And now, after running app we can see our live clock in frame 😎. Good job!
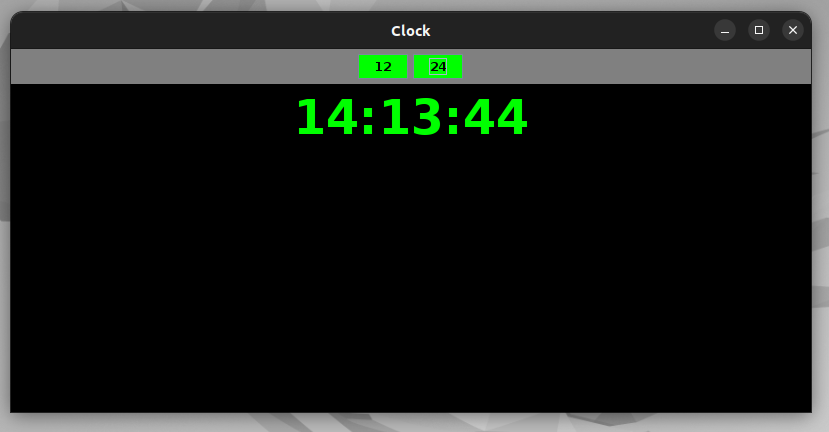
JButton
Clock works as desired, but now we would like to add buttons, with which we can switch between two time formats (12 or 24 hours). We can do It with next very important component, which is JButton.
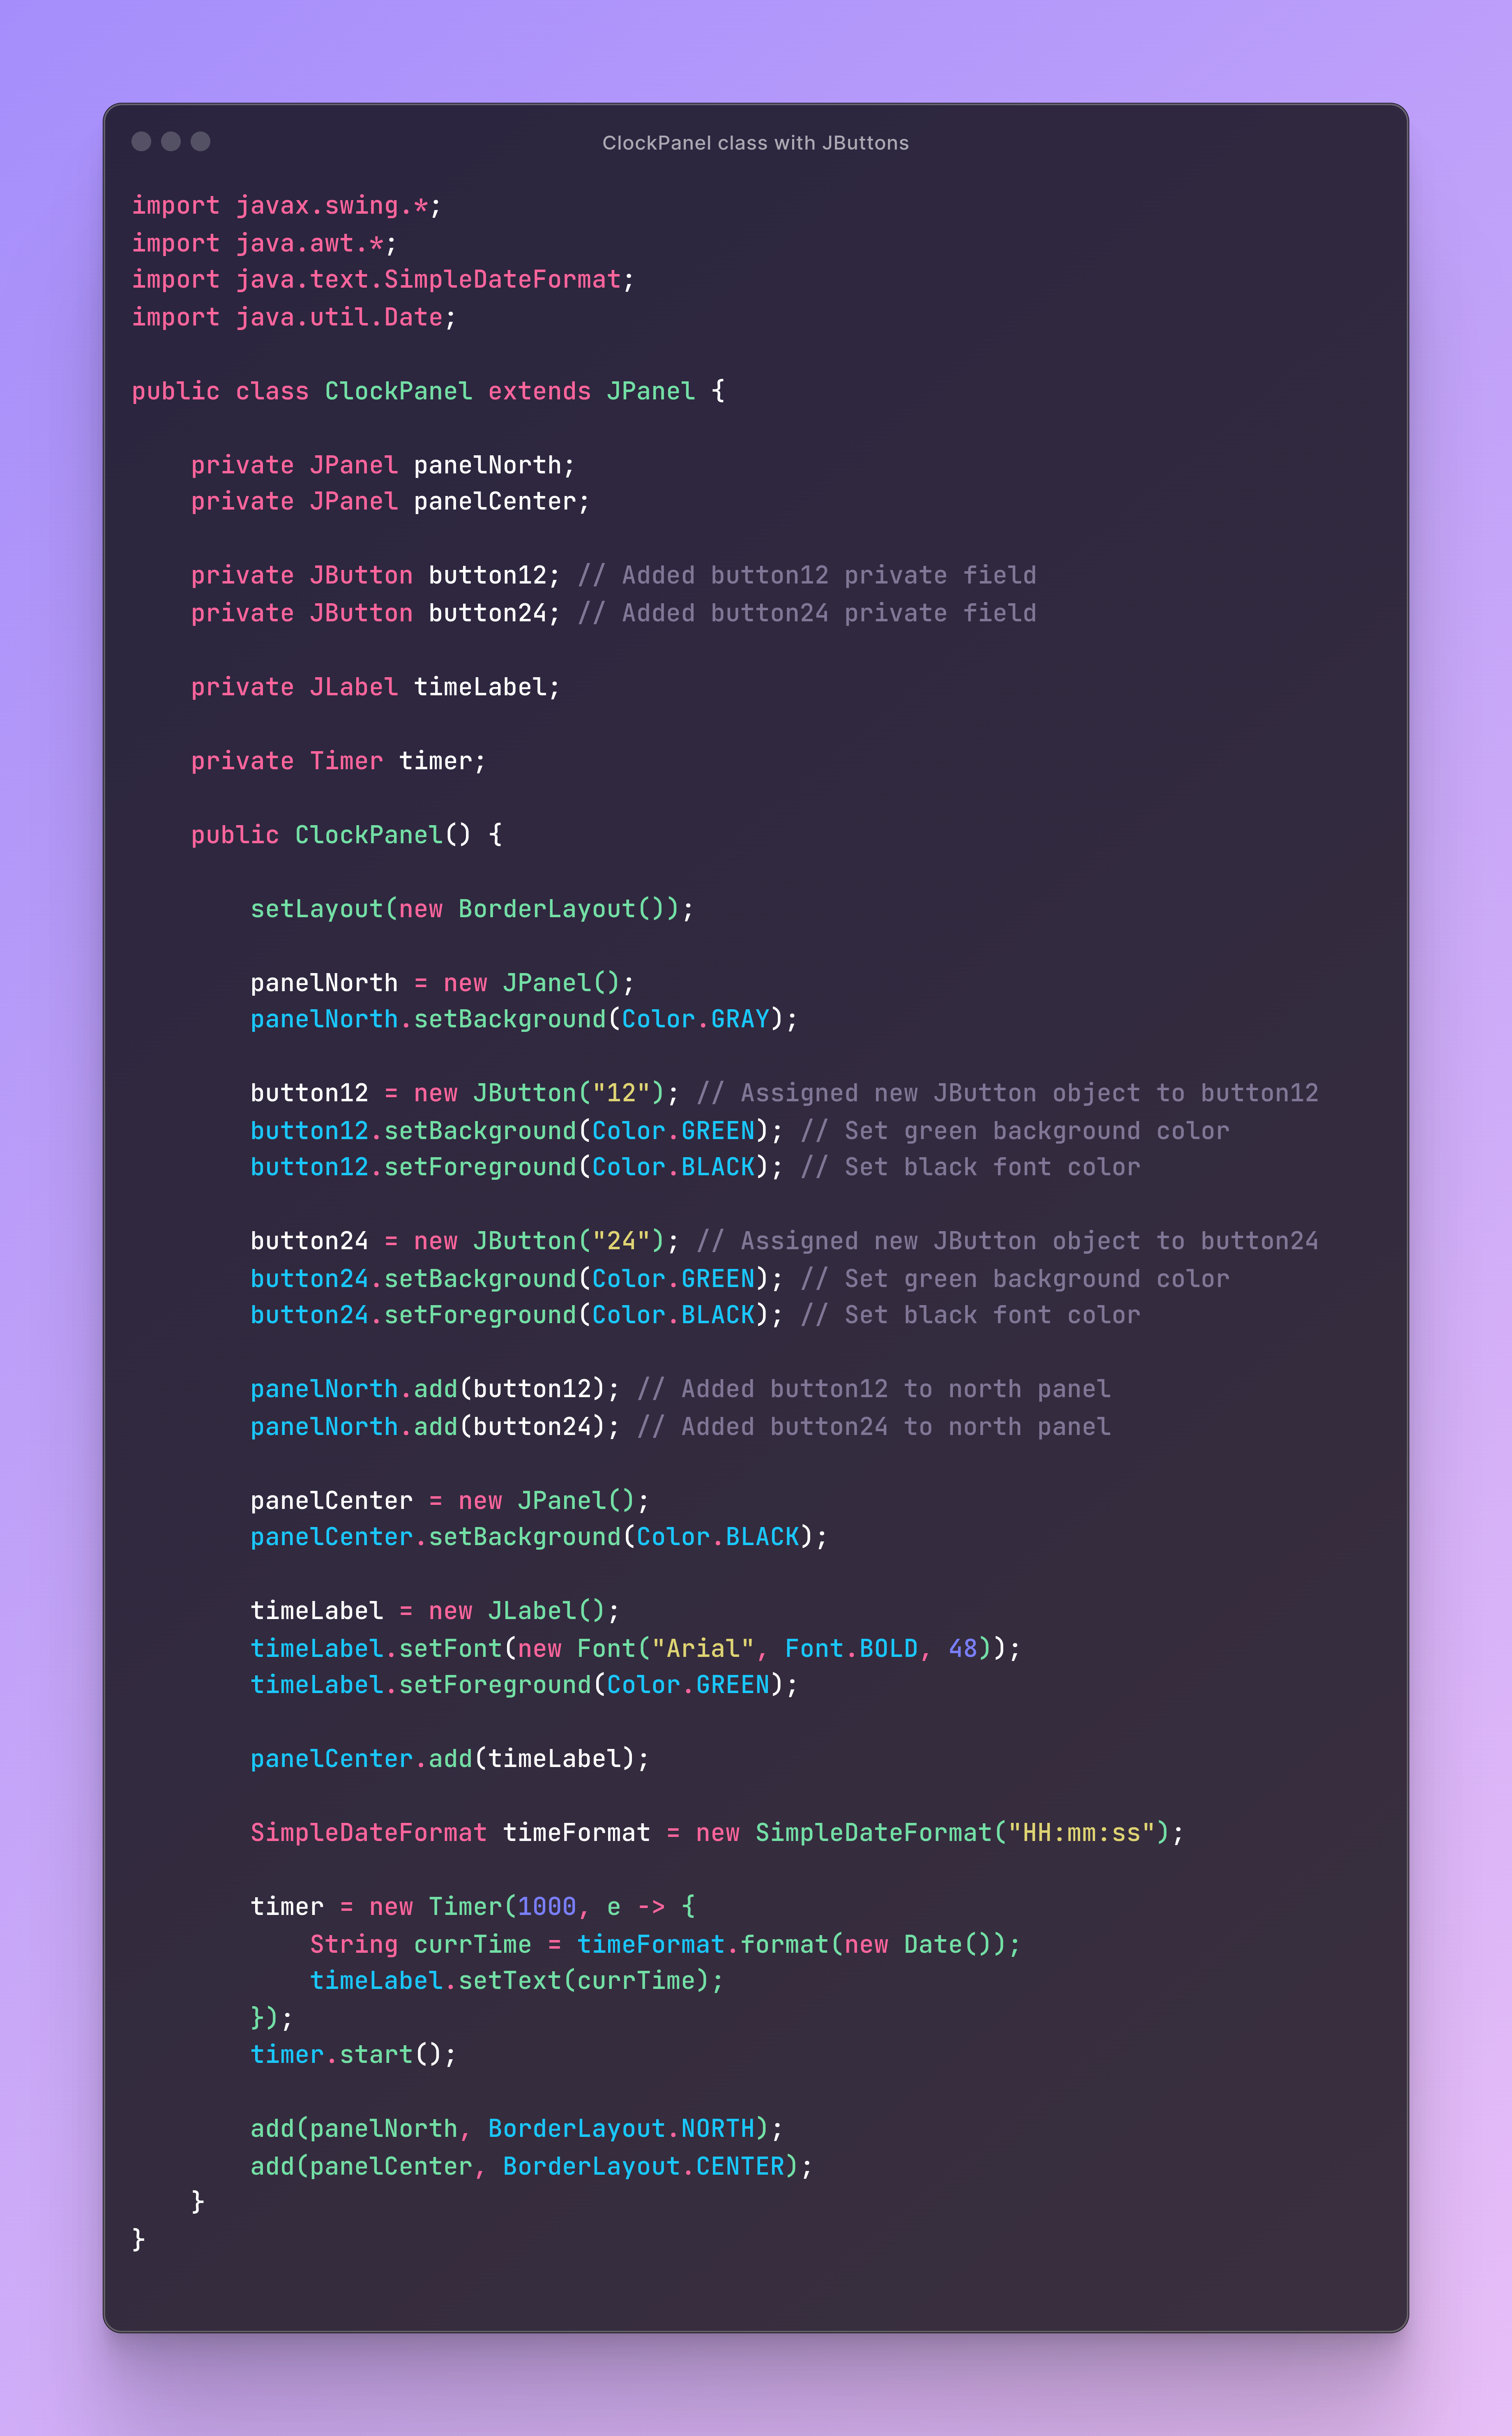
- I created two JButton private fields, which represents proper time format.
- I assigned new JButton objects to both fields in constructor. As constructors arguments I entered text, which you can see on button.
- With setBackground() method I determined background color of buttons.
- With setForeground() method I set color of font.
And that's the effect...
ActionListeners
We have many listeners (mouse listener, key listener, window listener...), but I will present you the most proper for our app. To make our buttons respond to clicking, we should add action listeners to them.
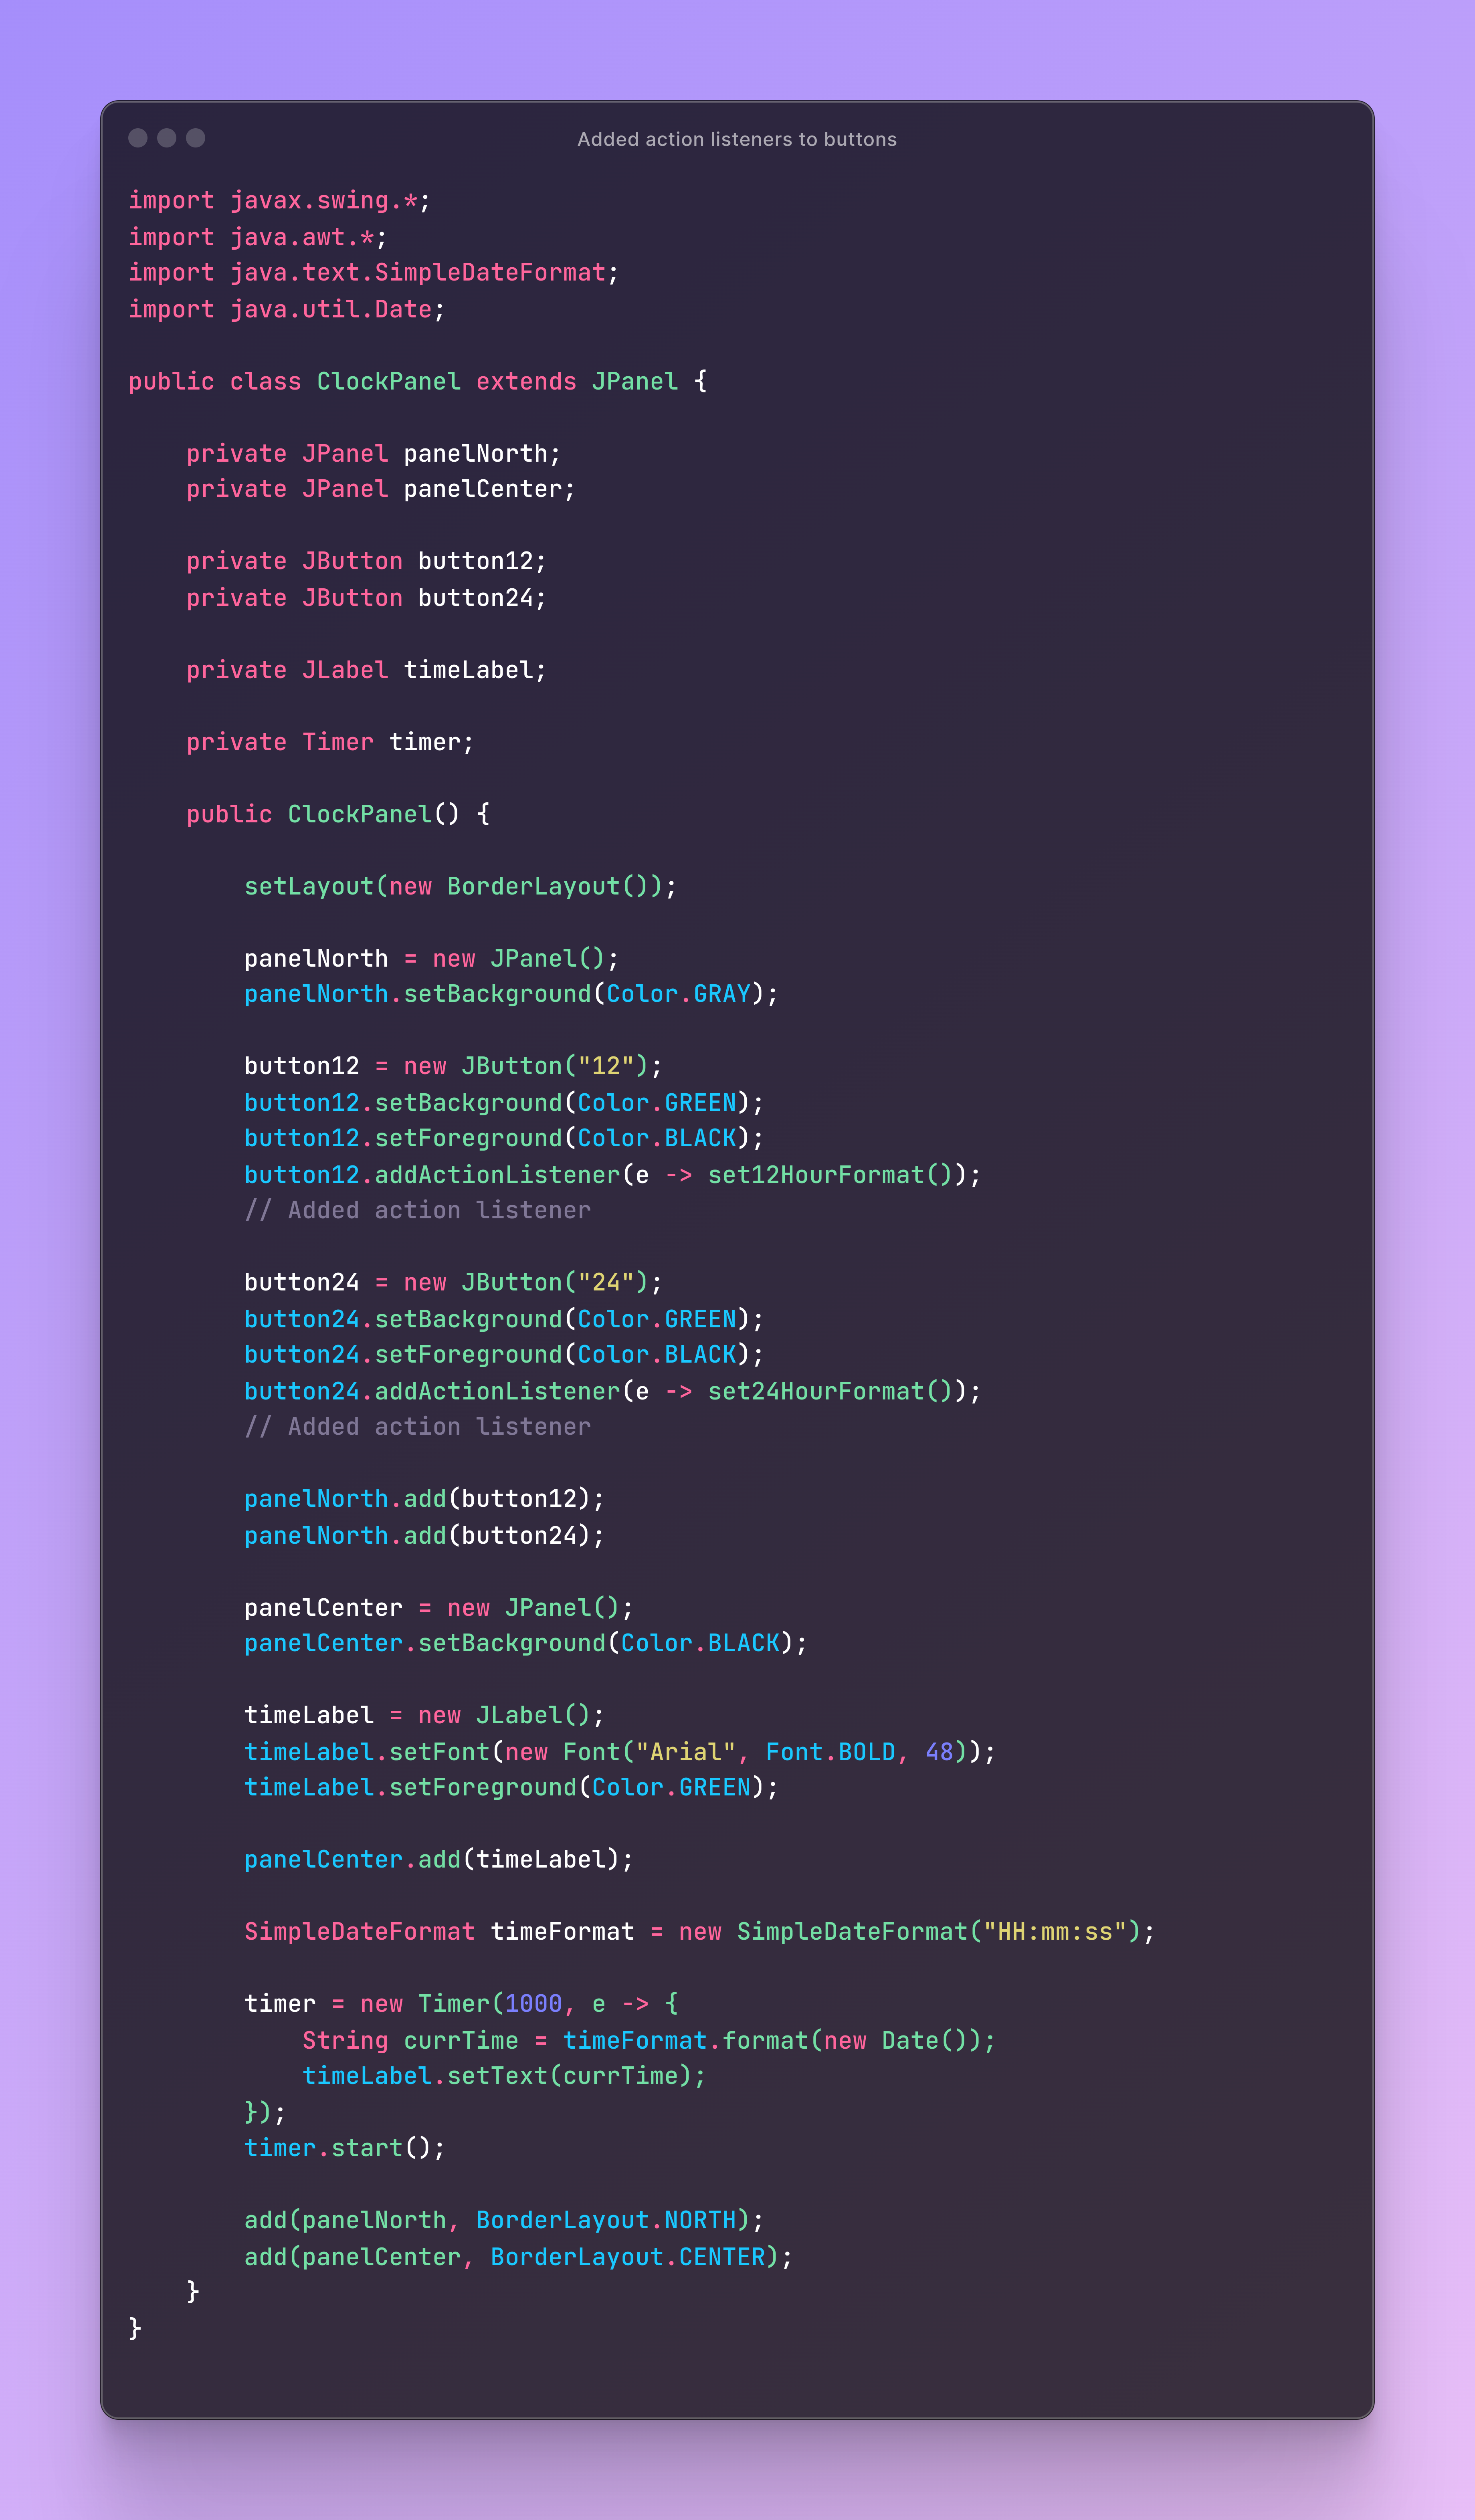
I simply called addActionListener() method on both buttons. As an argument I entered lambda expression, which determines action performed when we click button. In this case clicking button12 will execute set12HourFormat() method and clicking button24 will execute set24HourFormat() method.
Why we using lambda? It is shorter way of implementing actionPermorfed() method from ActionListener functional interface. e refers to ActionEvent, but in both case is not useful.
Now consider both methods:
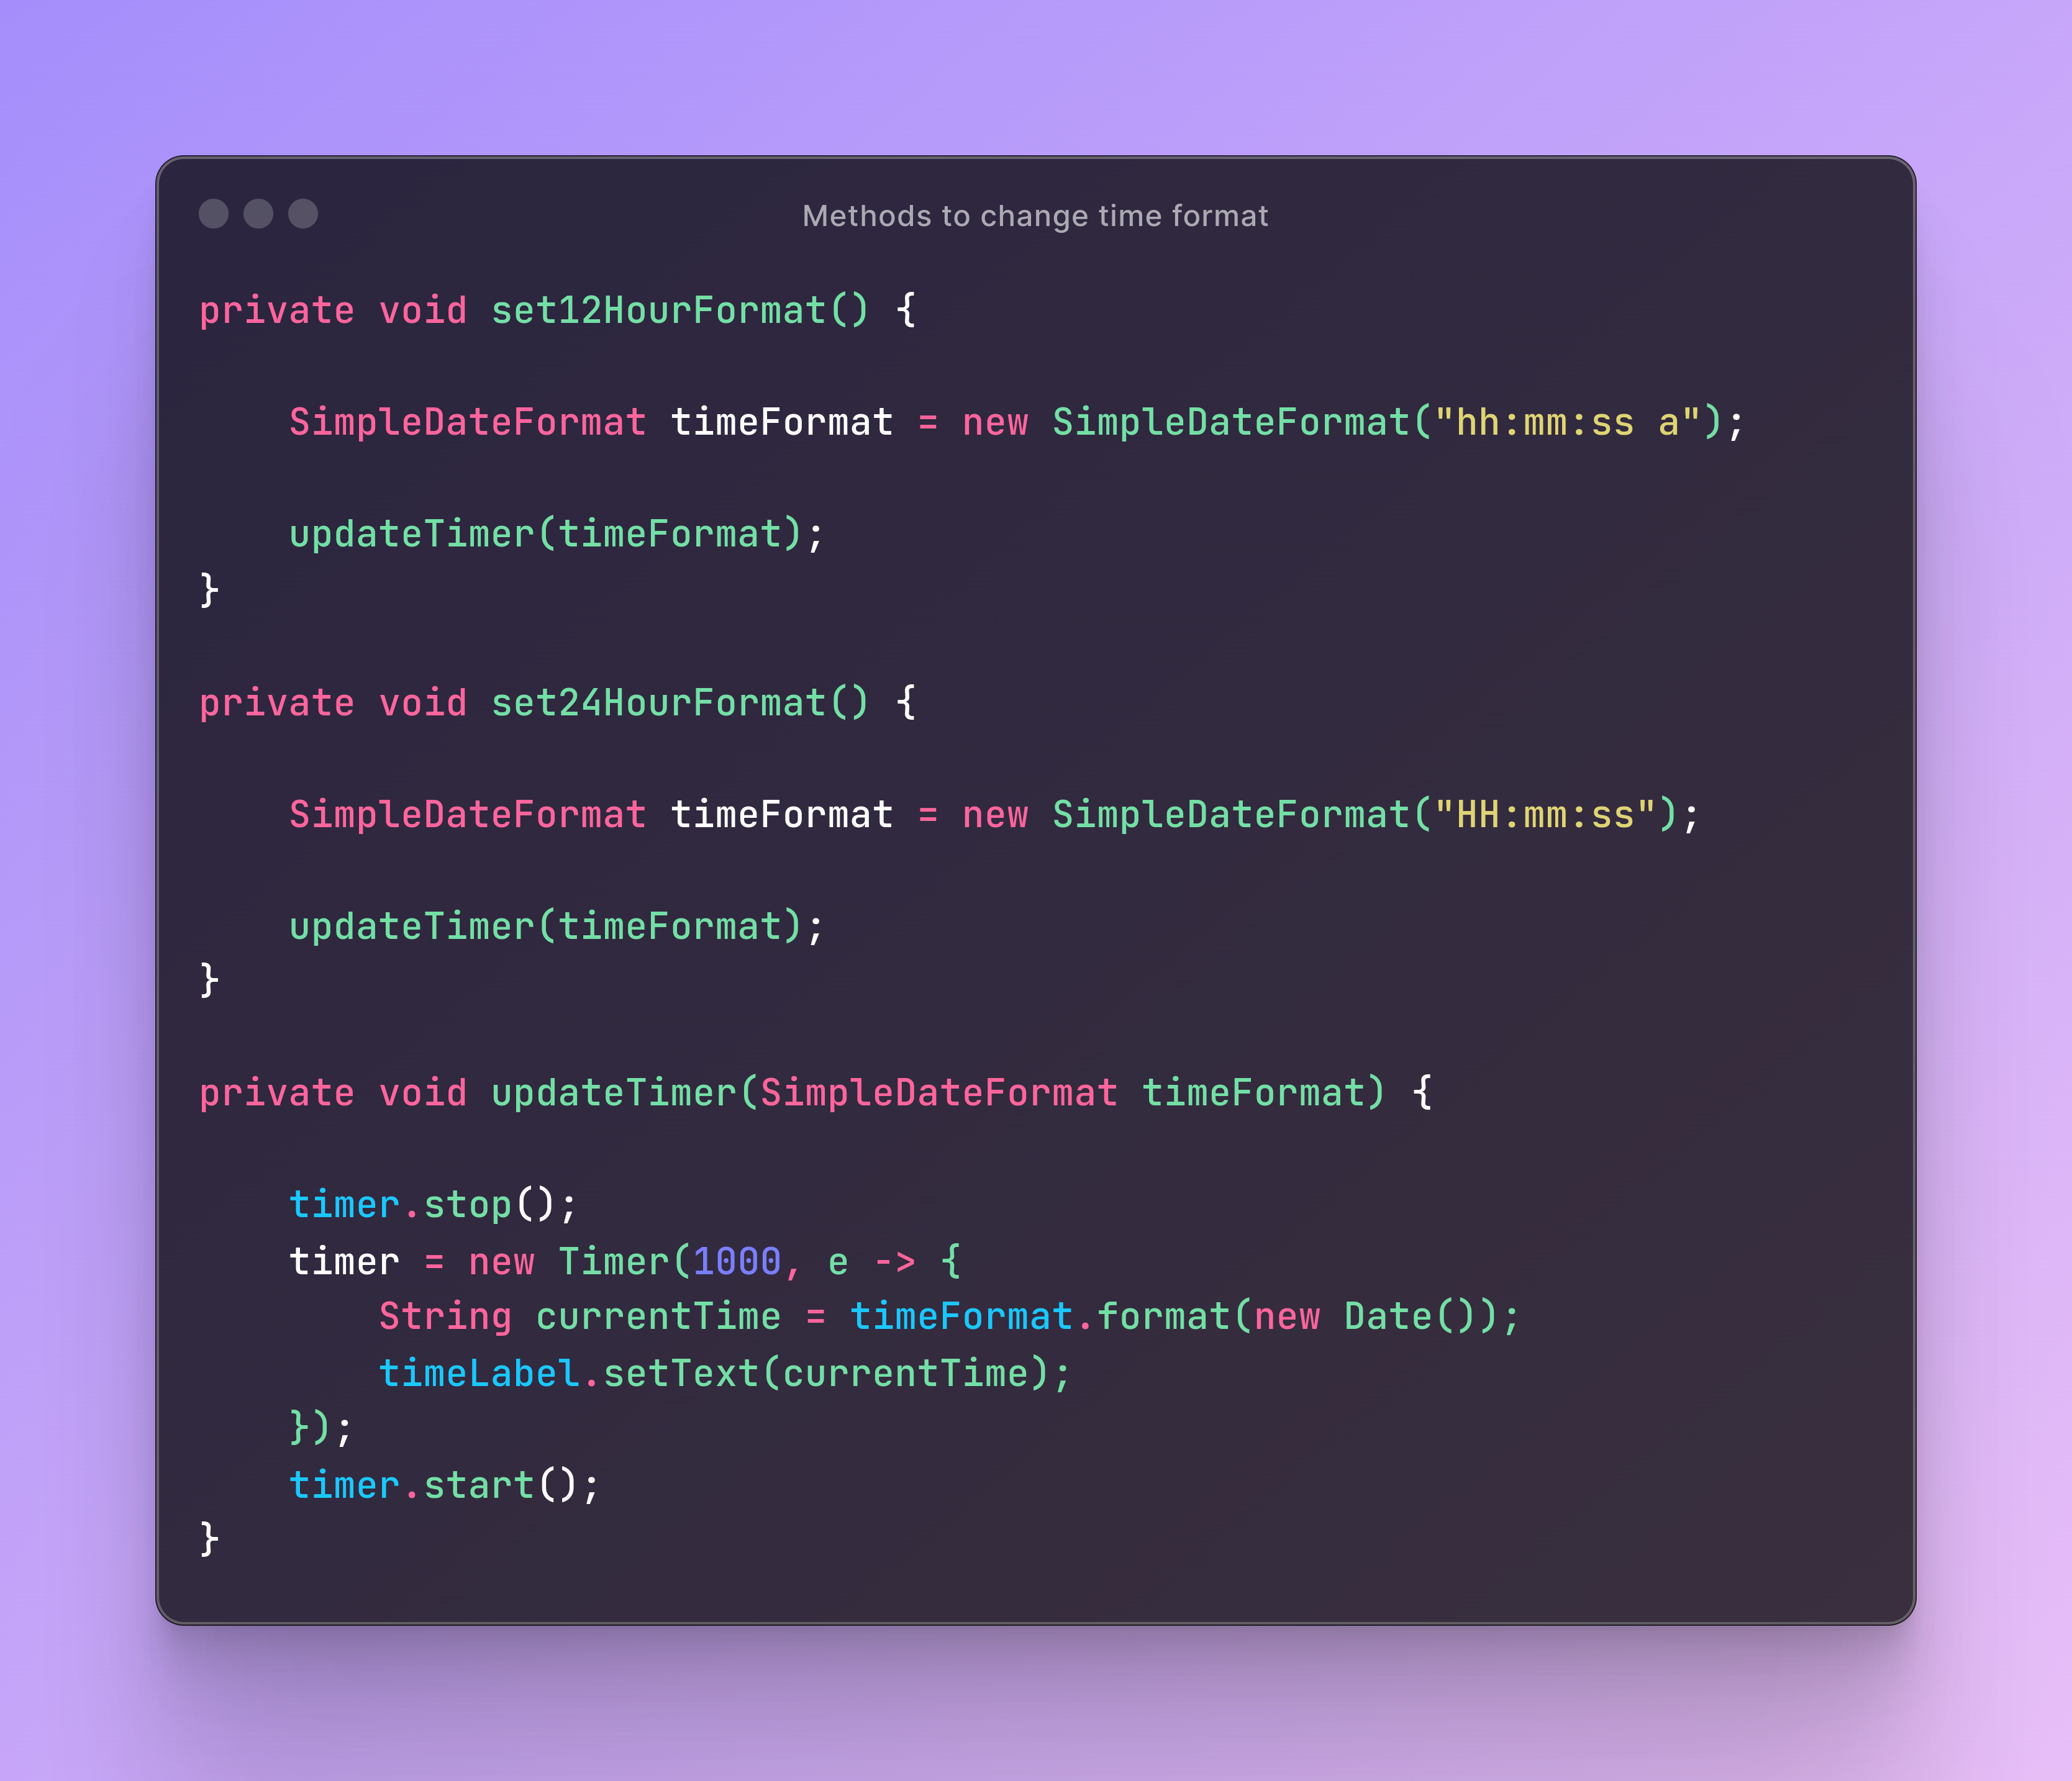
Both are similar, but sets different time format.
- Firstly these methods determine desired time format.
- Then stops current timer and then they are updating It to display time in desired format.
- On the end new timer is started.
And our clock is finally ready to use!
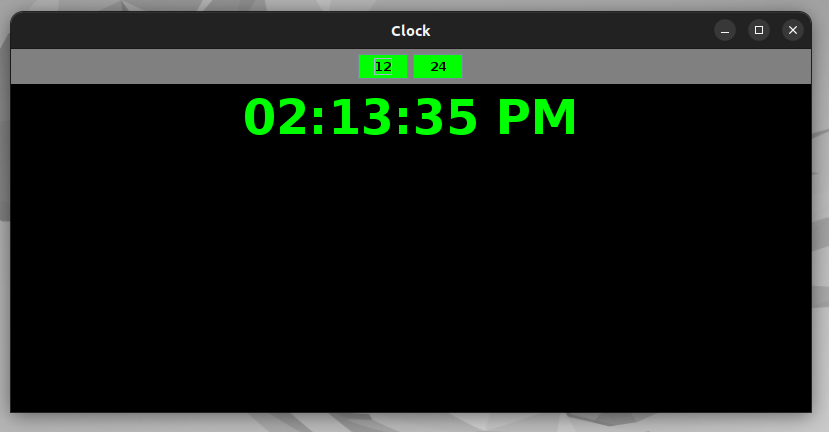
And remember - you can customize this clock in whatever way you want. There are many more components and options to customize them. Feel free to do it!
Summary
Thank you for reading this article! We created clock app, which displays live time in format, which you choose. As you can see, with Swing and AWT we can create more interesting and interactive apps. Of course, these libraries are old and probably not used in commercial projects, but it's a good idea to learn how to build graphical user interface with events using them and later switch to JavaScript more easily.
Now, it's your turn. Start practicing by experimenting with different features and customizations. Here are a few suggestions to get you started:
- Customize clock, which we coded today.
- Create login and register panel.
- Create calculator.
- Create to-do list.